How to set up a proxy in Octo Browser - Simple step-by-step manual
Published
Jun 24th, 2026
Topic
Manual
Reading time
10 mins


Author
StableProxy
Why is Octo Browser necessary?
Octo Browser allows you to manage multiple browser profiles on your device, each with its own browser fingerprint. Consequently, you can run different instances at once, limited only by the resources your computer has.
Octo Browser is a web browser that allows you to manage multiple instances or profiles on your device. Each instance has its own unique browser fingerprint, allowing each of them to appear as a separate browser on a website or web service. This allows the ability to conduct multiple parallel sessions in the browser on a single device, each with its own settings and identification.
How to set up a proxy server
You can set up Stableproxy for use with Octo Browser by simply following the instructions below:
- Download and install Octo Browser. Registering and logging into an account allows you to get started.
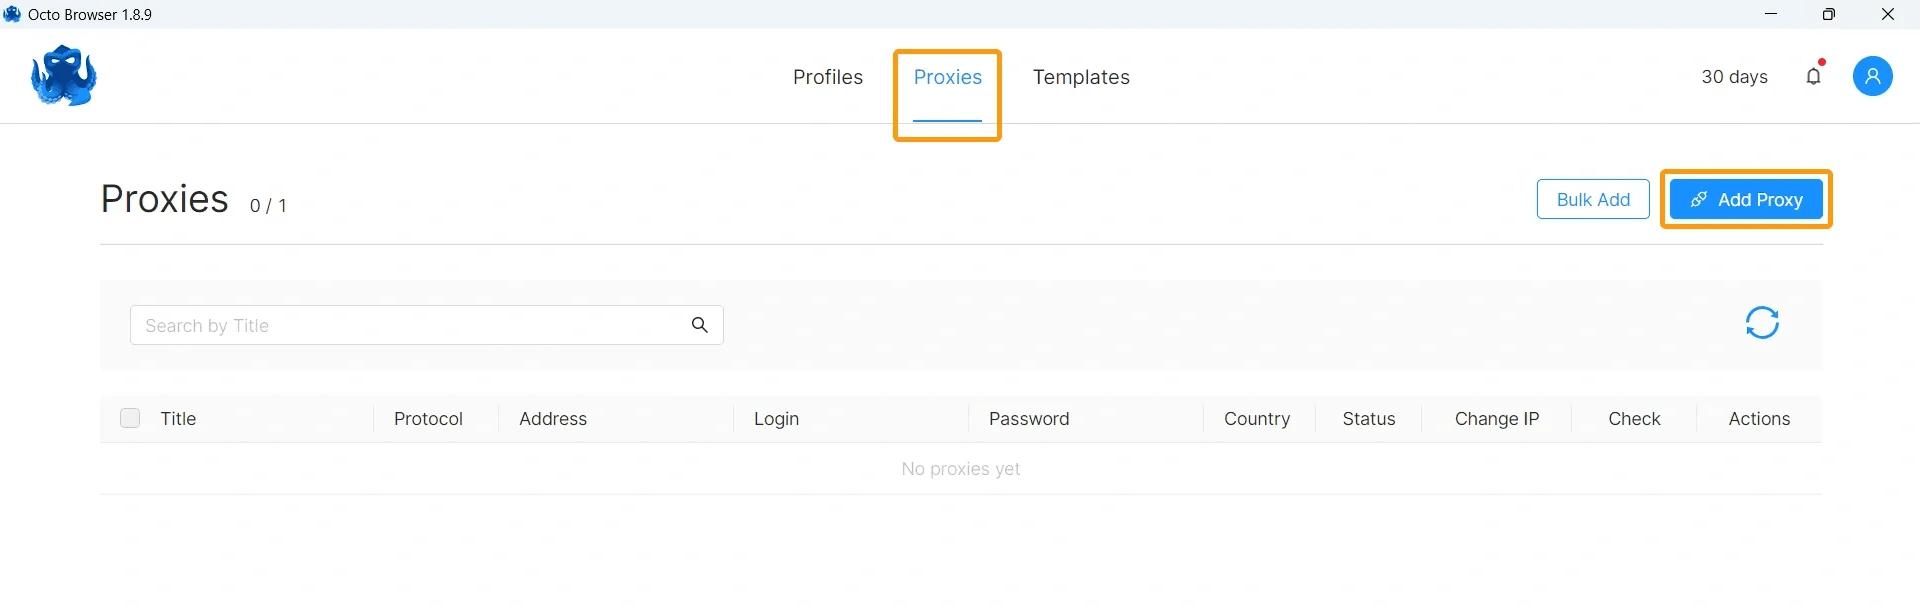
Proxies configuration is handled separately from browser profiles in Octo Browser. It simplifies the process of adding and removing proxies, and assigning them to different profiles. - Go to the "Proxy" menu and click "Add Proxy" to enter the proxy server details.
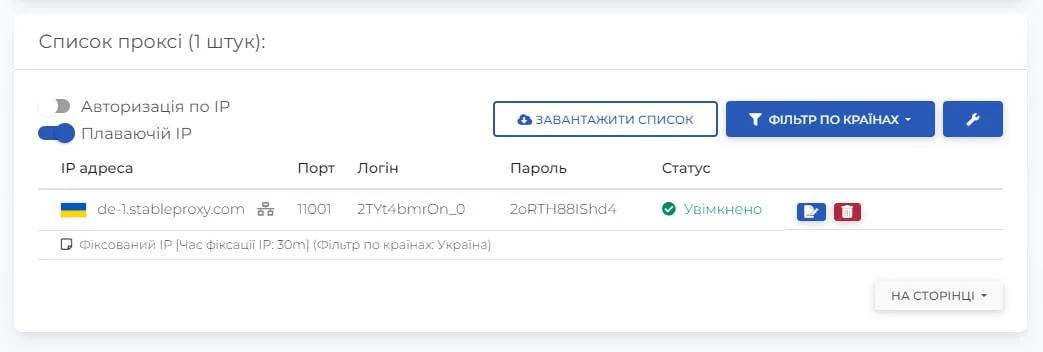
- Fill in the proxy settings fields according to the details from the control panel
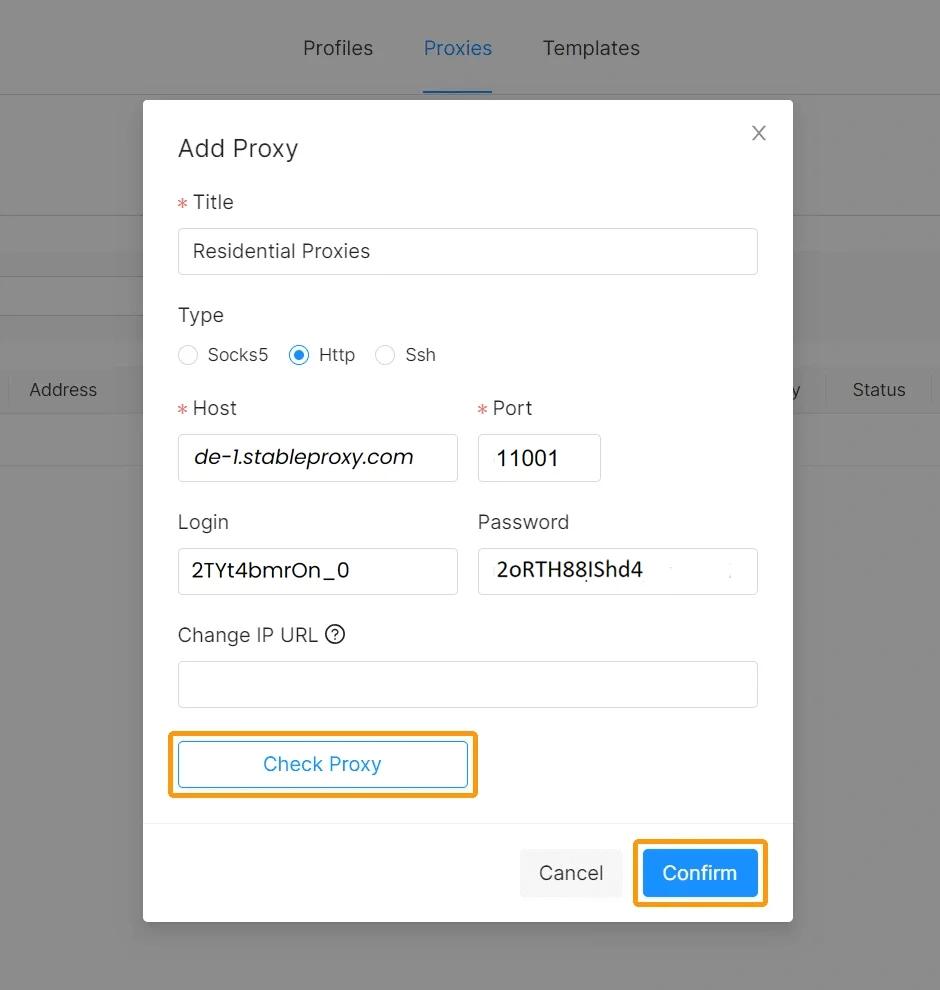
Be sure to toggle on the "Test Proxy" option to ensure the proxy server is functioning. Then, click on the "Confirm" button. - Enter the user credentials for the Stableproxy. Be sure to use the same credentials you used when creating a new proxy user on the Stableproxy Control Panel.
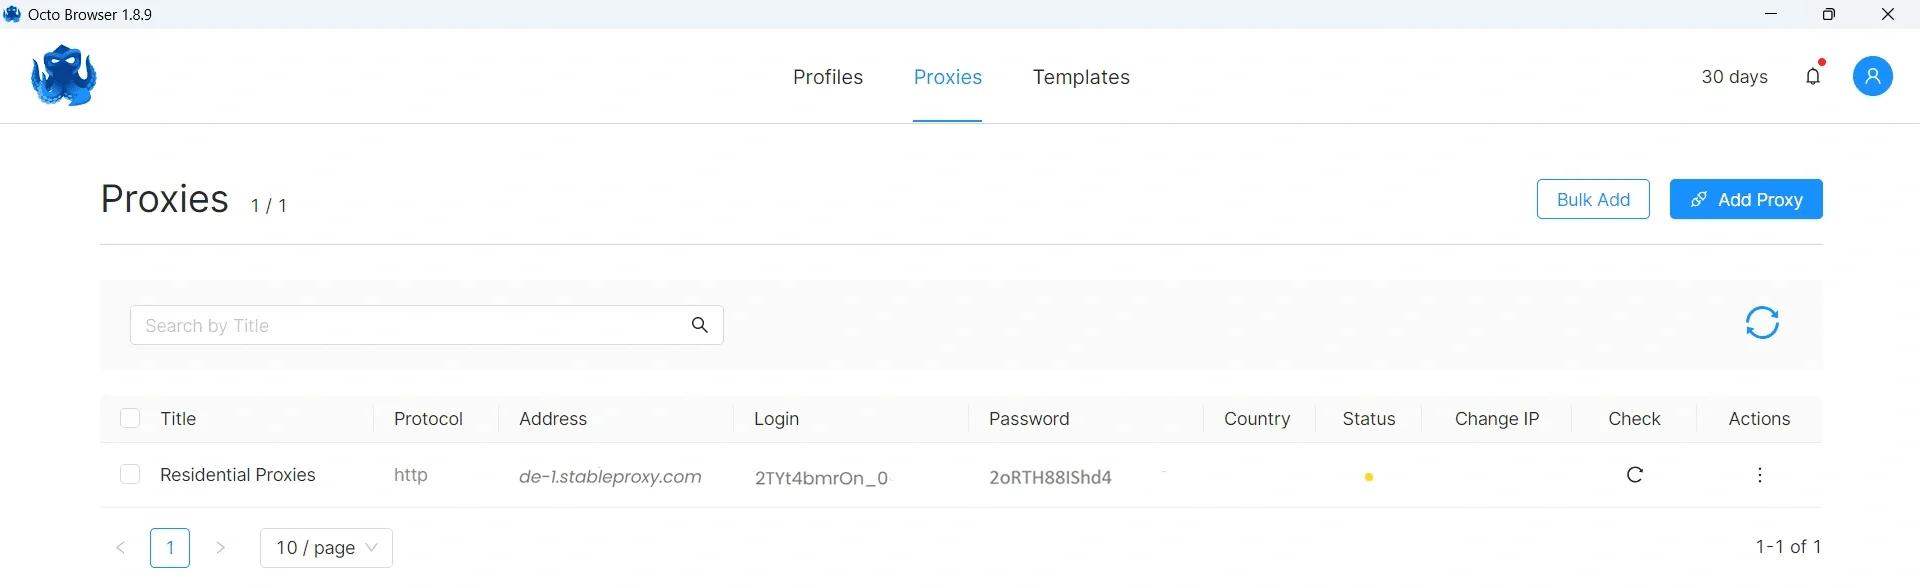
You can add as many proxy servers as you need and associate them with different profiles.
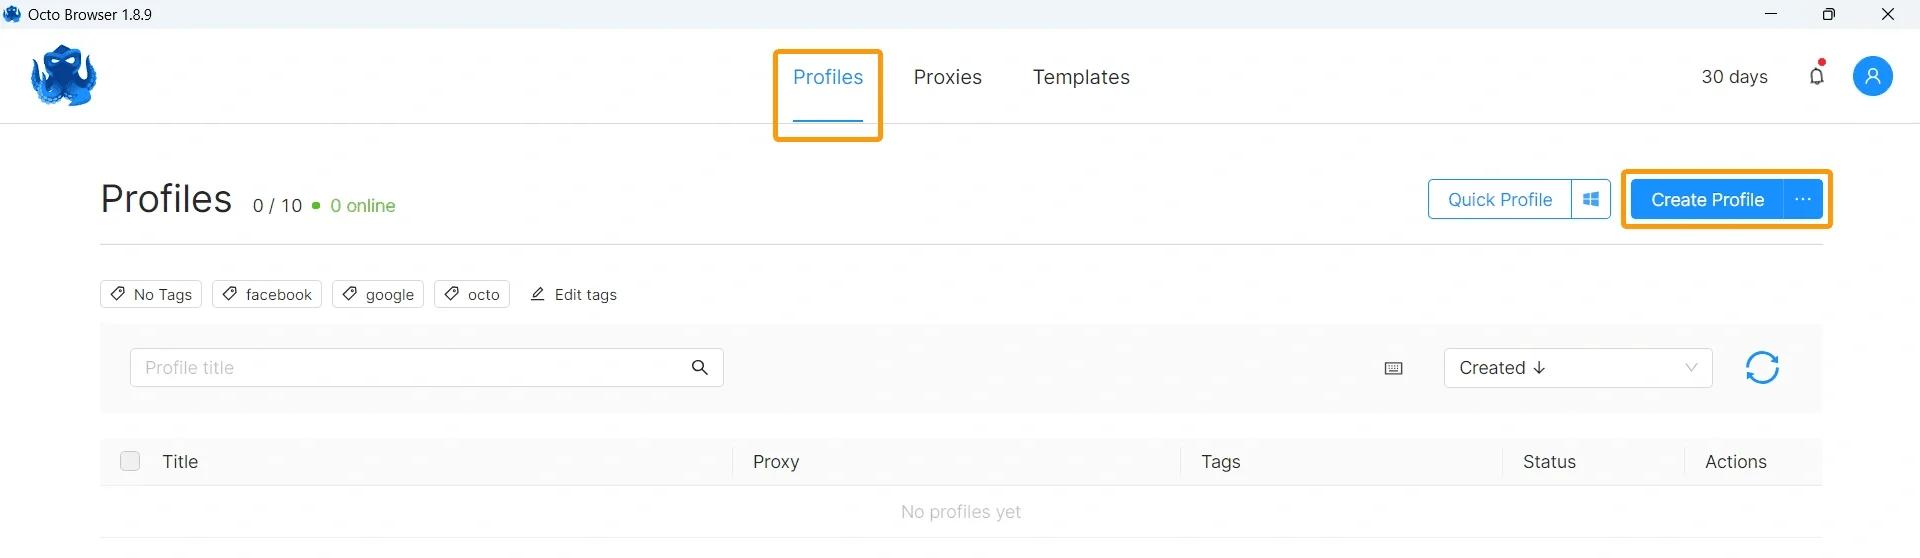
- Go to the "Profiles" section and click "Create Profile" to set up a new profile.
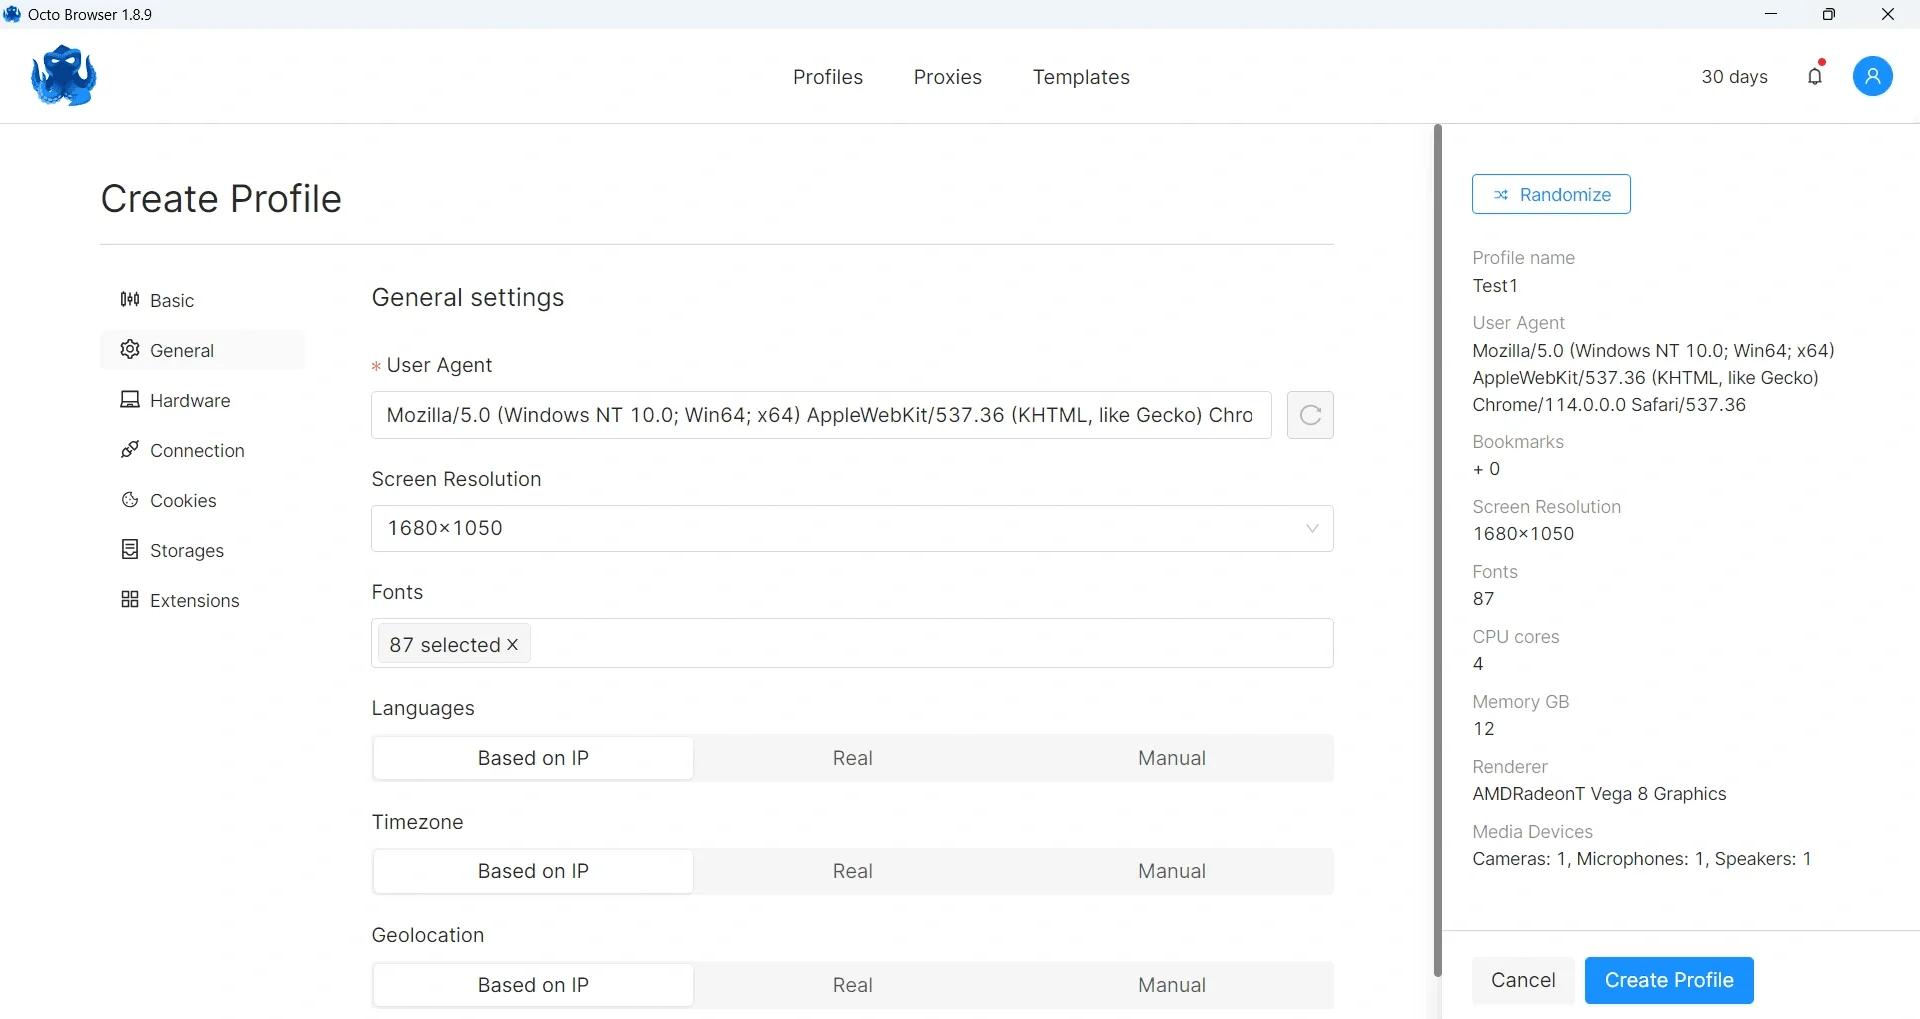
Configure your profile, setting various parameters such as user-agent settings, cookie files, and hardware/software settings.
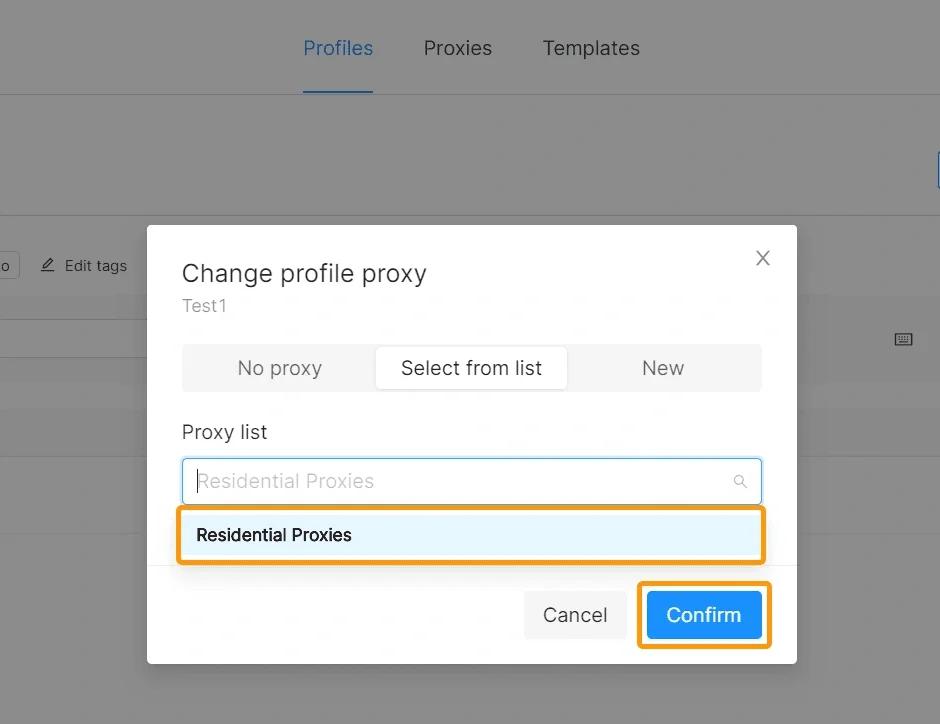
- After setting up the profile, you can assign a corresponding proxy server to it. You can do this by selecting the Proxy section in the profile settings or by going to the Connections tab when editing the profile.
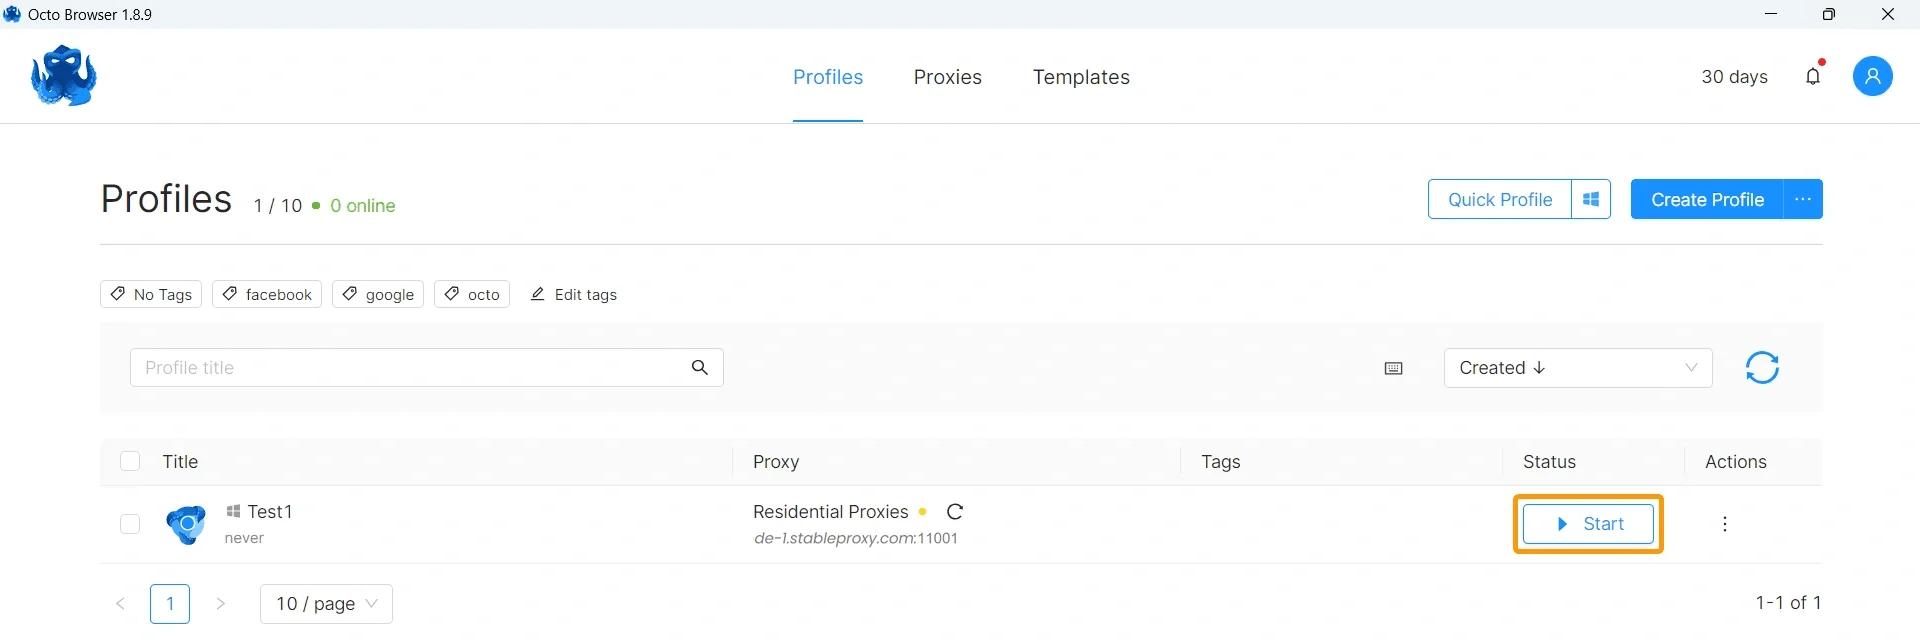
The profile has been successfully set up and connected to the proxy server. - Finally, click the "Start" button (▶) to start a new Chromium instance.
You are now ready to perform your tasks in a secure and anonymous environment!
StableProxy.pl © 2023-2024