How to set up a proxy server in SessionBox - StableProxy
Published
Jun 25th, 2026
Topic
Manual
Reading time
10 mins


Author
StableProxy
SessionBox Overview
SessionBox offers a secure and protected method for managing multiple active sessions. It allows for simultaneous application of multiple accounts in one window, ensuring confidentiality and protection. Plus, SessionBox gives you the ability to use proxy servers for each session, enhancing your browsing experience and making it anonymous.*.
SessionBox Extension Installation Process
Below is an illustration of the process of installing SessionBox for your browser:
- Chrome and Opera users install the SessionBox extension from the Chrome app store.
- Firefox users can go to the official SessionBox website and click the "Install" button located in the top right corner.
- Launch the application and create a new account or enter data to log into an existing one.
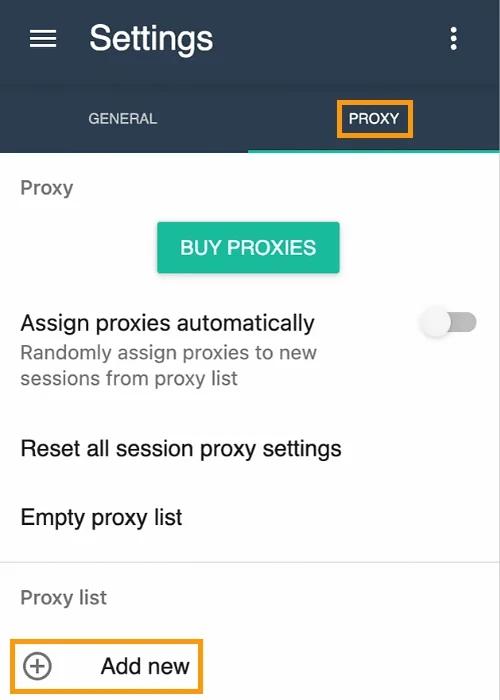
- Open the menu by clicking on the three horizontal lines and select "Settings".
- Go to the "Proxy" tab and click "Add new" to create a profile.
- Complete the proxy settings using the information you will find in the control panel.

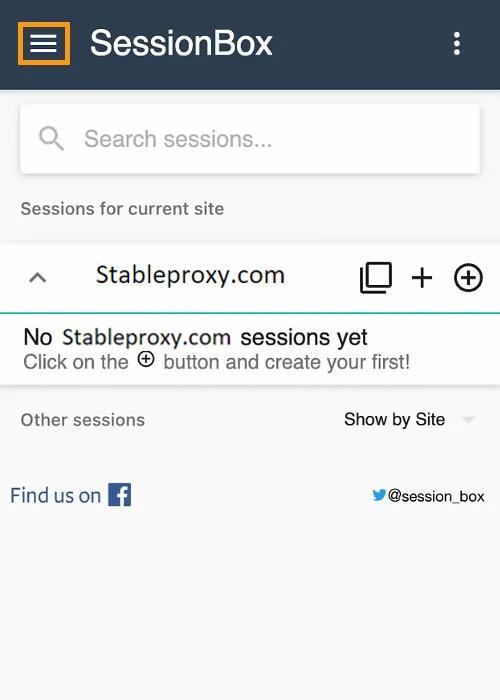
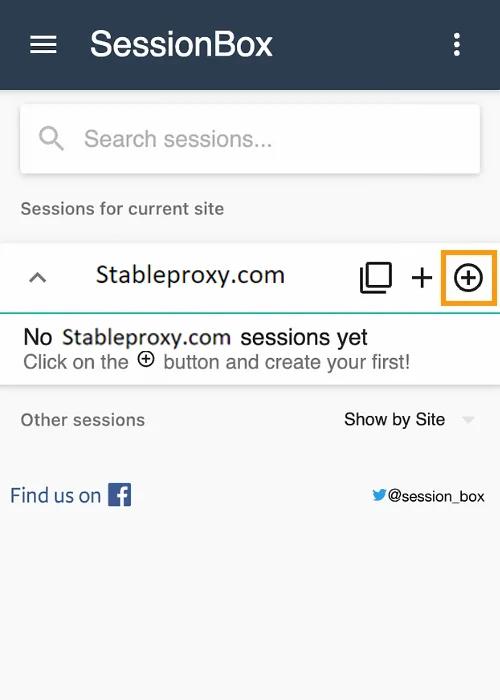
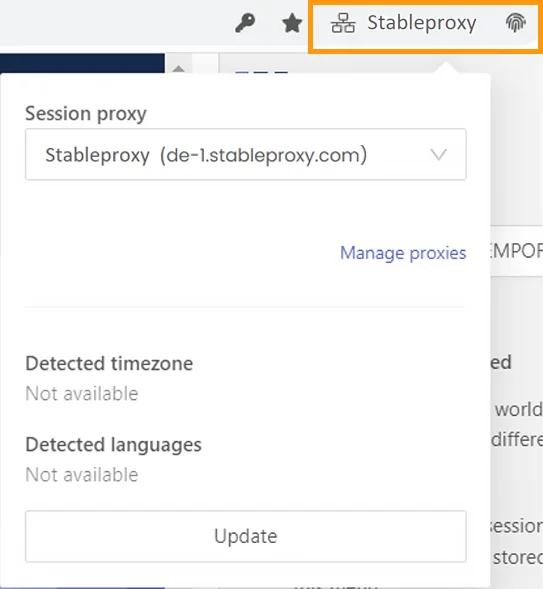
NOTE: You can conveniently create and manage your proxy users in our information panel. - Once the proxy has been added, it is important to assign it to a new session. Head to any site without alternatives and open the extension. Then press the "New saved session" button.
- Open a new tab and return to the extension. Press the three dots next to the new session and select "Settings" from the menu provided.
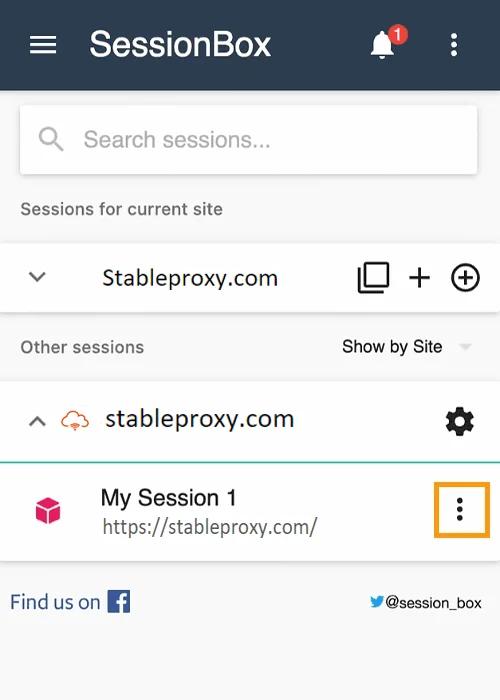
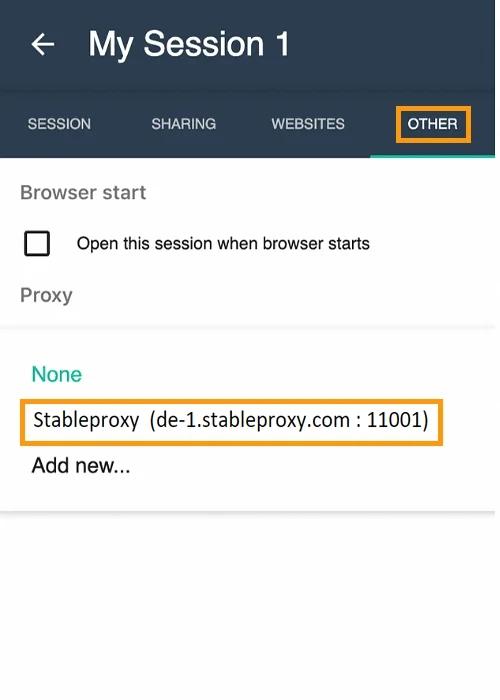
- Navigate to the "Other" tab and select the profile you created in the "Proxy" section
Congratulations! You have successfully configured Stableproxy residential proxy servers with the SessionBox extension.
Instructions for setting up SessionBox Workstation:
- Go to the product page and press "Install" in the top right corner.
- Download the installation file and proceed with the installation.
- Log into the system using your SessionBox account or create a new one if it does not exist.
Instructions for setting up proxy servers in the SessionBox extension:
Note that the process of proxy integration is identical for Chrome, Opera and Firefox extensions.
- Open the SessionBox extension and press the three horizontal lines to open the menu. Then select "Settings".
- Go to the "Proxy" tab and press "Add new" to create a new profile.
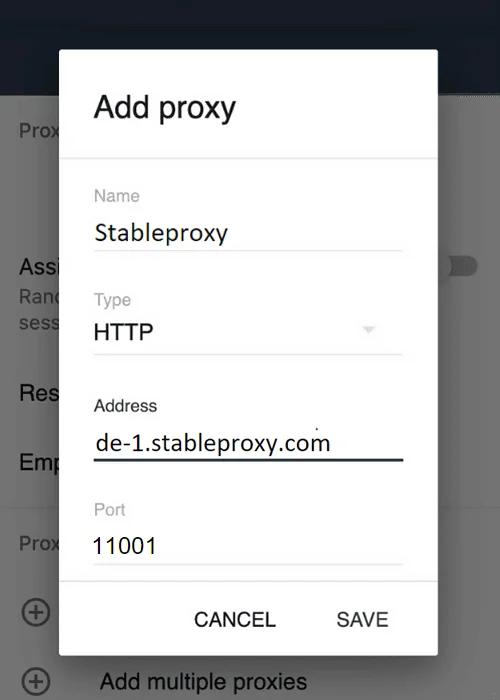
- Name your profile and choose the desired type of connection (HTTP, HTTPS, SOCKS5, or SOCKS4). Then complete the proxy server address and port you want to use.
For example, if you want to use Stableproxy proxy servers, complete the proxy settings using the information available in your control panel:
- Scroll down in the same window to enter the username and password of your Stableproxy user. After completing the credentials press Save to save the settings.
- After adding the proxy, you need to assign it to a new session. Visit any website and reopen the extension. Press the New saved session button to form a new session.
- Having opened a new tab, return to the extension and press the three dots next to the new session. In the list, select Settings.
- In Settings, go to the Other tab. In the Proxy section, select the formed profile.
Done! Your new session should now use a new IP, different from yours. To check the functionality of the proxy server, you can visit a website that displays your IP.
Setting up proxy servers in SessionBox Workstation
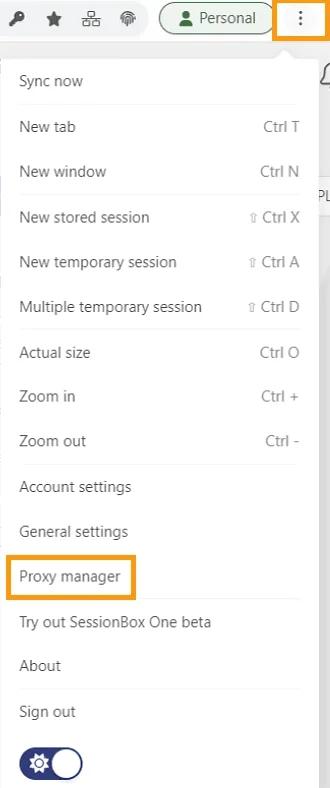
- After logging in find and press the icon with three dots in the top right corner.
- In the list select Manage proxy servers.
- Press Add new to form a new profile.

- Complete the proxy settings using the information that you will find in the control panel.
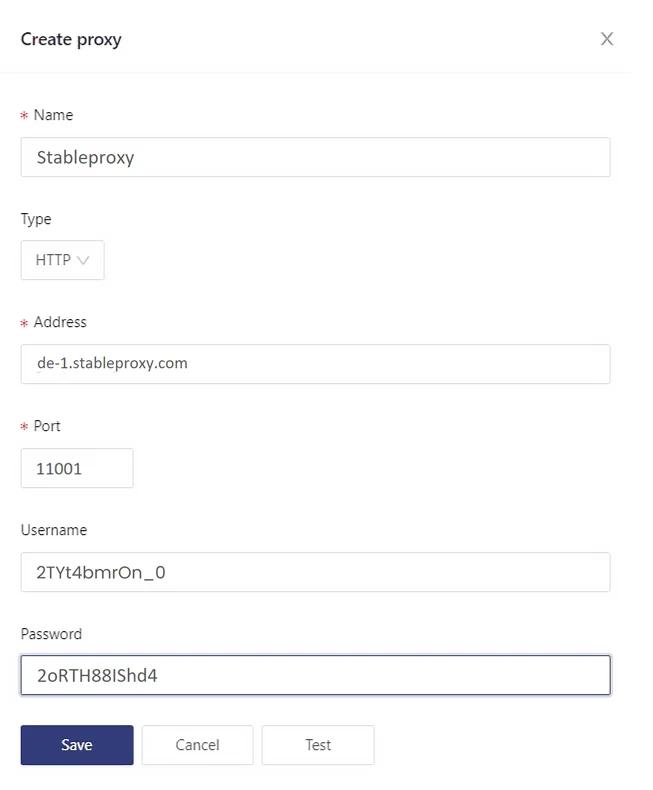
- Complete the Stableproxy username and password in the corresponding fields, then press the Save button.
All done! To check the geolocation of the session to the network, simply press the name of your profile located to the right of the search bar.
For access to additional proxy information press the three dots and select General settings. A new window will open where you can easily configure proxy use according to your needs.

SessionBox vs Multilogin
SessionBox and Multilogin are two distinct solutions with different functionalities and pricing policies. Despite this, SessionBox can be seen as a prospective alternative to Multilogin. Both platforms offer features such as browser multitasking management, integration with proxy servers, browser fingerprint control and concurrent usage facilitation. It is worth noting that SessionBox offers an economically accessible option compared to the comparatively higher Multilogin.
StableProxy.pl © 2023-2024